

How To Record Audio With Windows Movie Maker
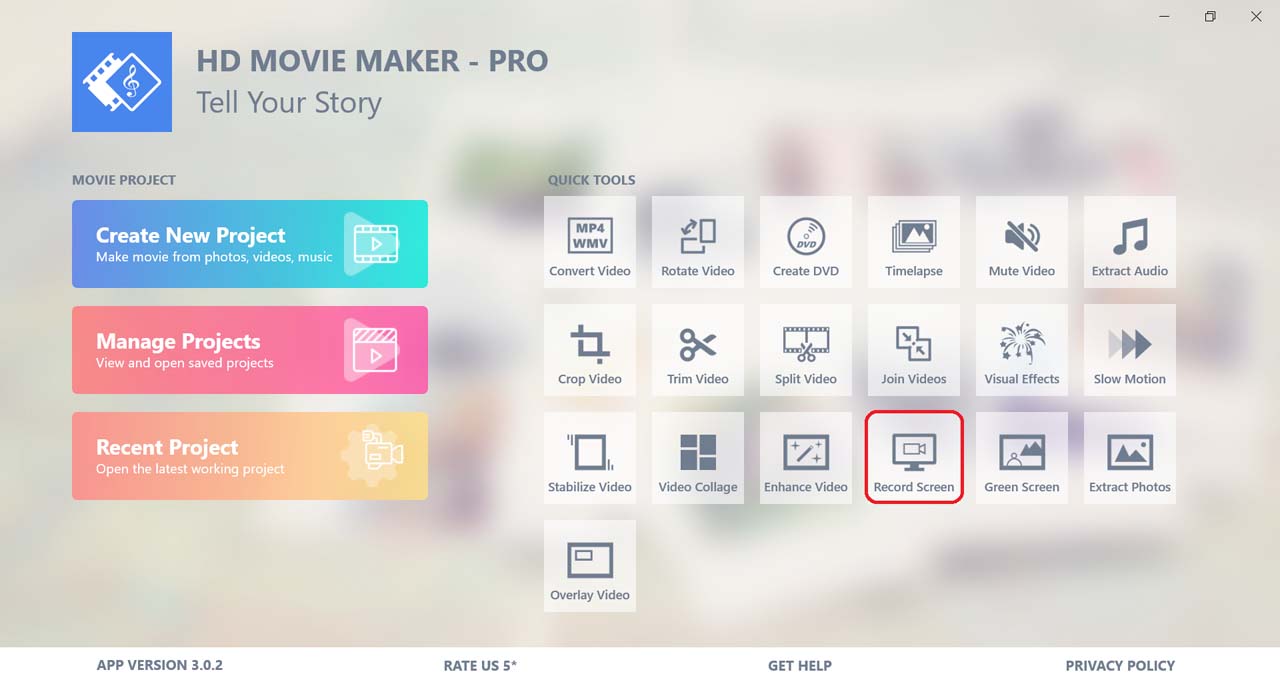
Record Screen is used to capture screen content and save as a video.
-
Select Tape Screen in the Quick Tools section to open the tool.
-
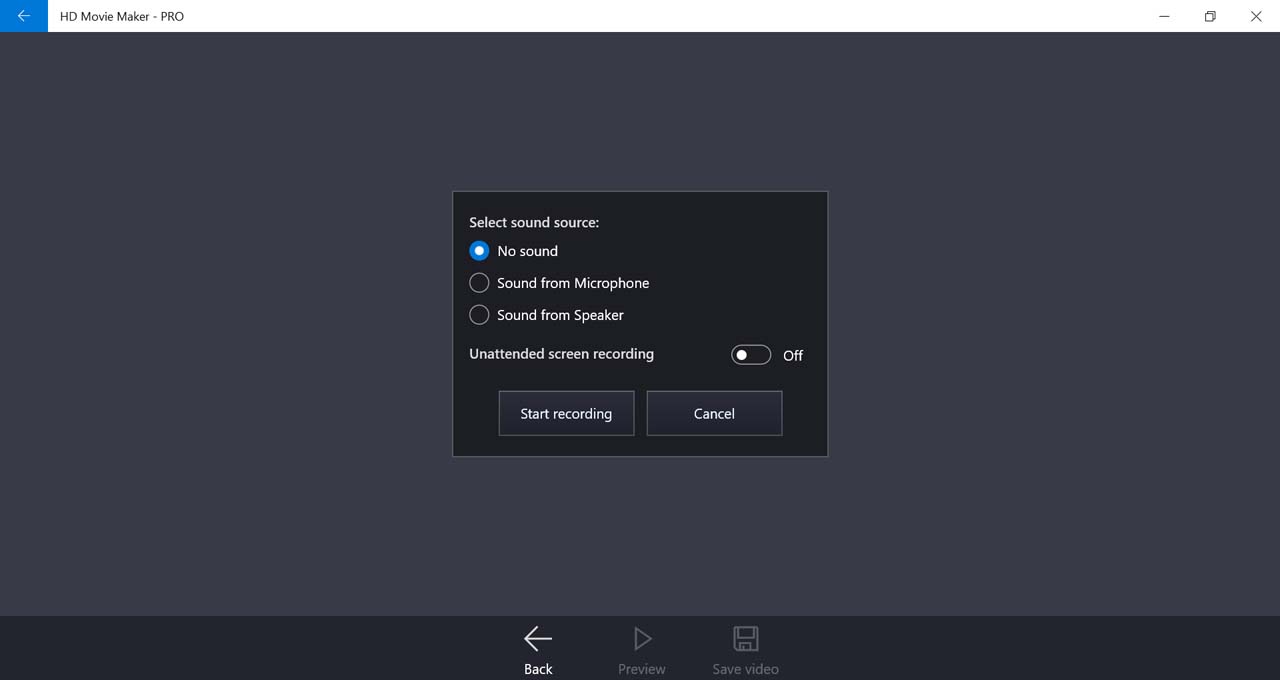
A setting window volition be shown adjacent. Here you tin choose the option for the recording session:
-
No sound: Sound volition not exist recorded.
-
Audio from Microphone: The audio from your microphone will be captured. (e.g. your vocalization)
-
Sound from Speaker:The sound from the system will be recorded (e.1000. game music, system notification sound, etc.)
Besides that, you lot as well take the pick for Unattended screen recording: Enable this if you desire to record a long video and you volition not monitor the recording session. If you enable this choice you will need to set duration for the recording session. Subsequently showtime recording, the session will run for maximum time of the fix duration.
-
-
To proceed, select Start recording. A new window volition pop up to choose what volition be shown in the recordings.
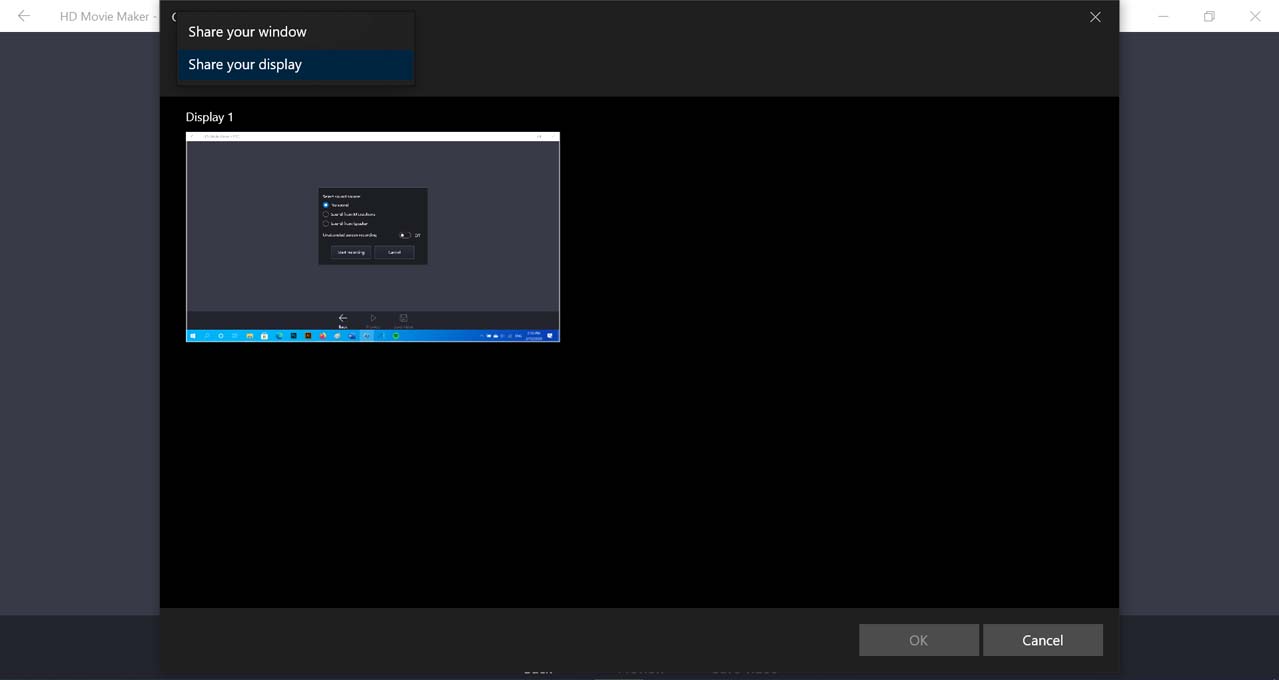
You can choose one of the two settings:
-
Share your window: Select the window/application you want to record.
-
Share your brandish: Select the display y'all want to record.
Of import note: After you beginning recording, you lot need to bring the window/application you want to record to foreground so that it is visible on your PC screen.
-
-
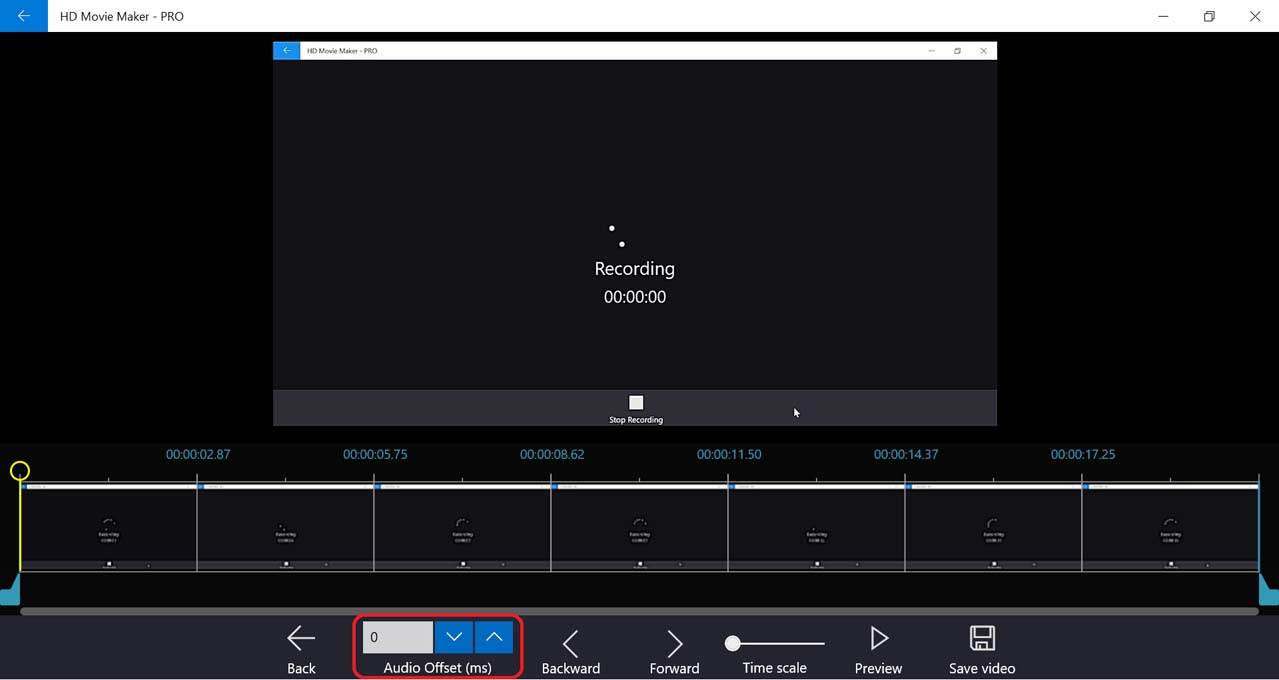
To stop recording, go back to HD Pic Maker, and select Stop recording.
 After that, a new screen will appear, from which you can:
 -
Trim the start/end of the video: Cutting out unwanted part at the start or end of the recording
-
Adjust the audio outset: synchronize audio and video content (just available if you cull to tape with sound)
-
-
Past adjusting the Audio Offset value you tin shift the recorded audio forrard or backward in fourth dimension so that it matches the recorded video content. The value of Audio Offset is in milliseconds.
-
The two cursors marking the beginning and the finish of your output video.
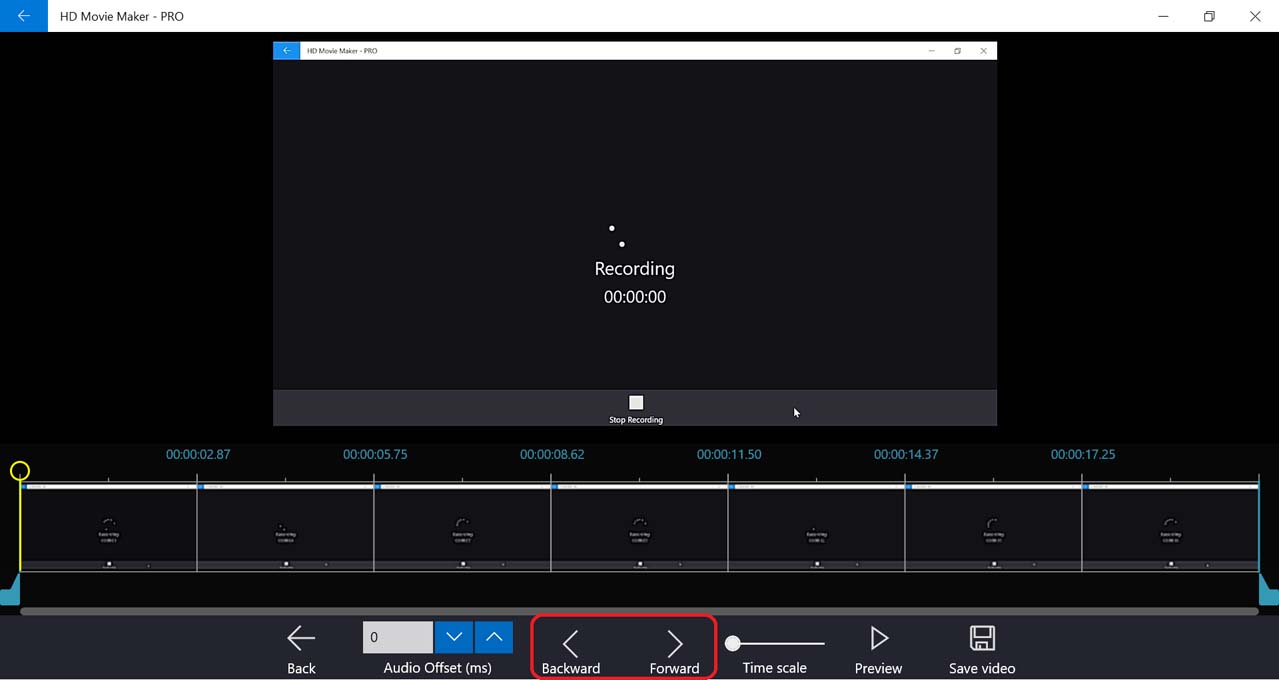
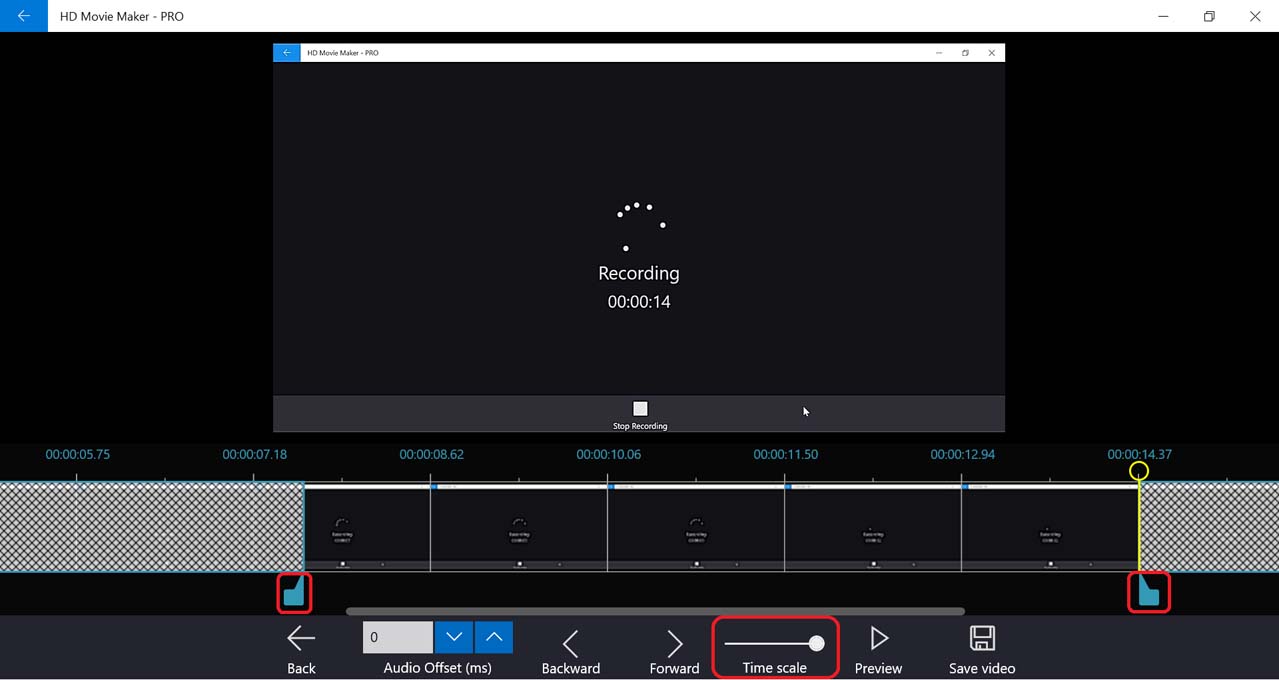
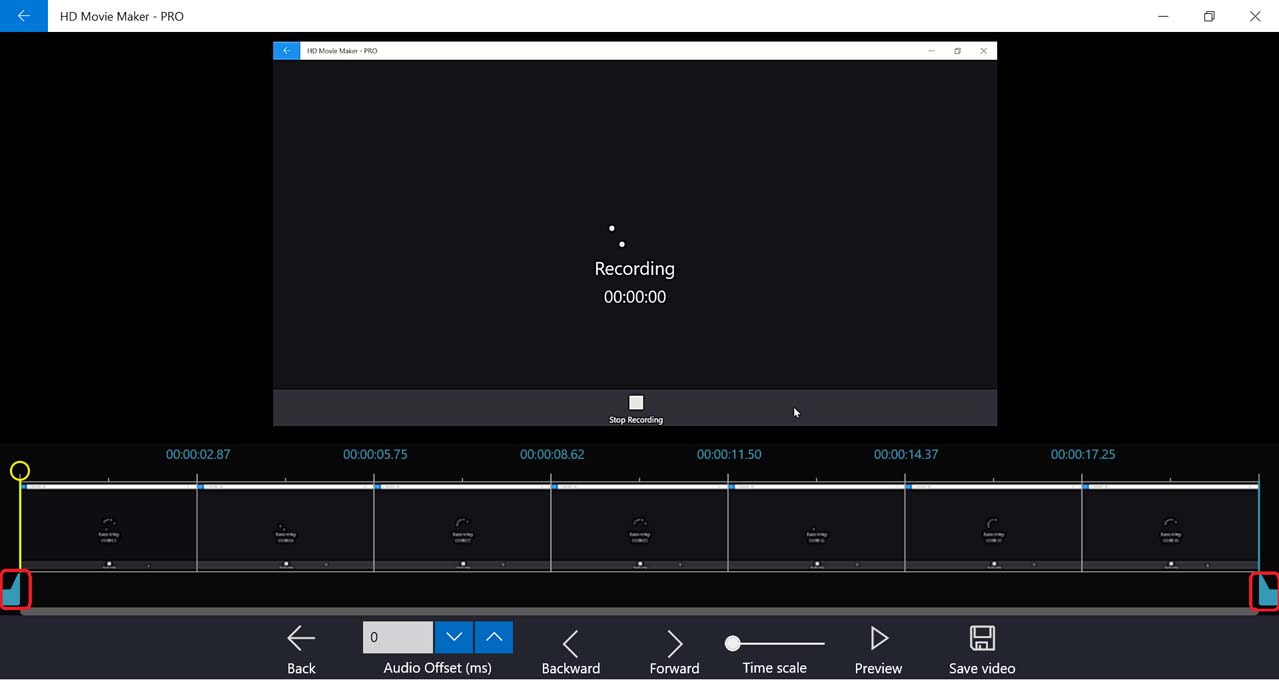 You lot can change the position of the cursors by selecting the cursor, then:
 -
Press the Forwards and Backward push button to adjust its position one frame forward/backward.
-
Drag the Time Scale slider to larger value so that you tin can drag the cursor more precisely.
Or
-
-
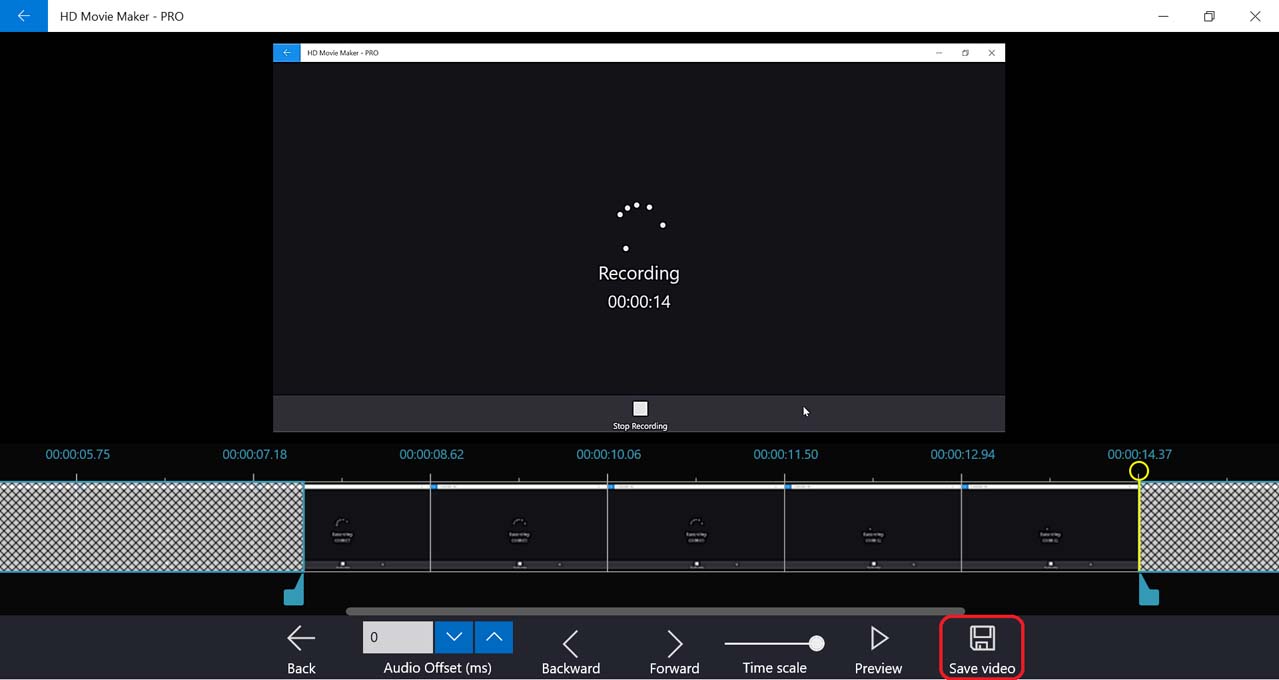
Use Preview when you want to view the changes before saving.

-
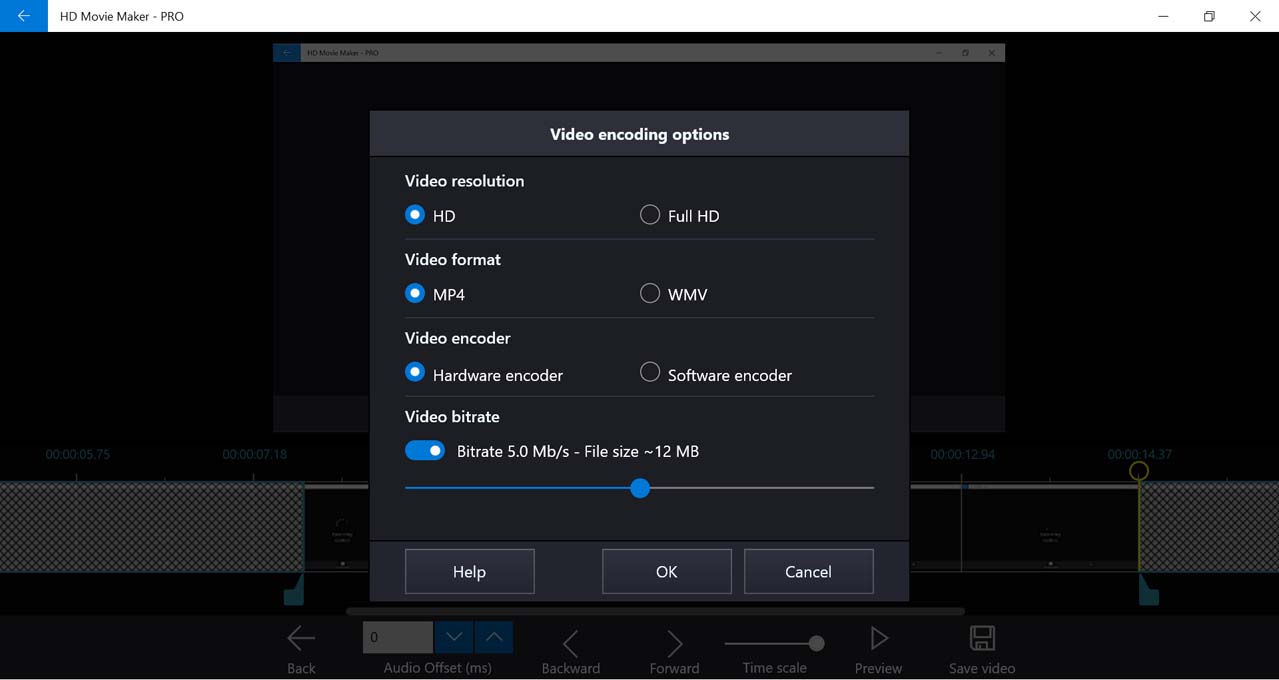
When y'all're washed, select Save video.
-
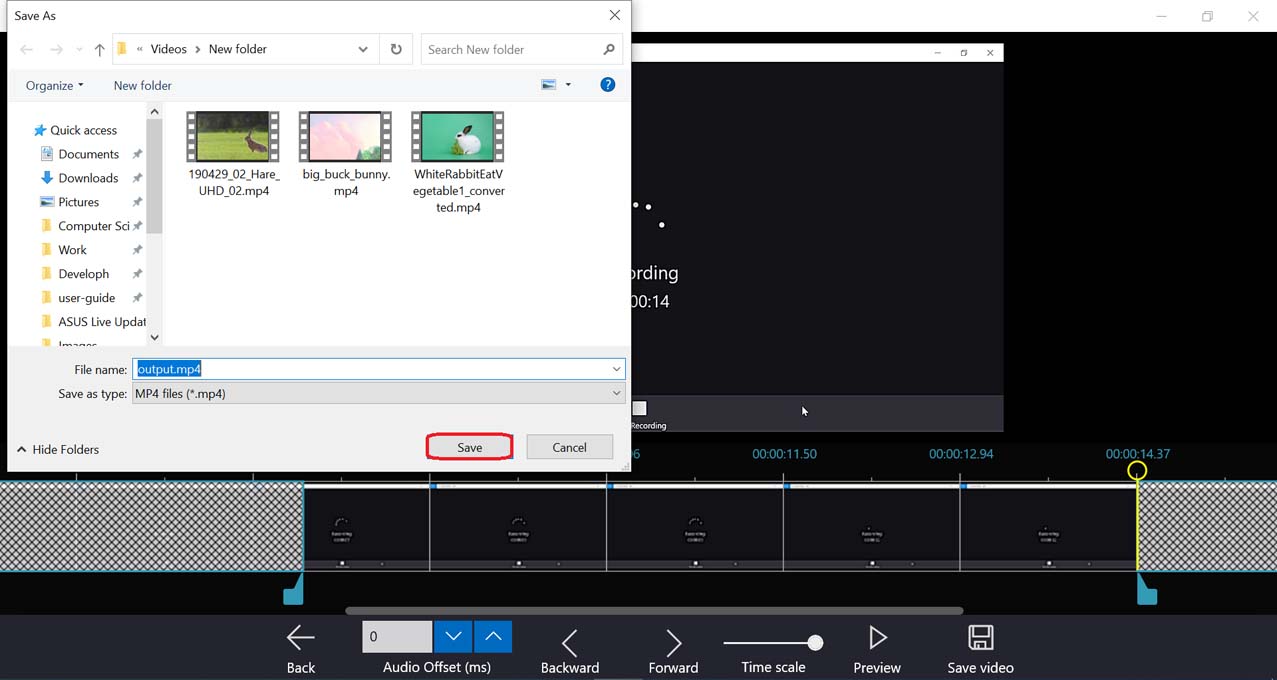
Select output movie settings, then press OK.
-
Side by side, cull the location of the output video file. .
-
After HD Moving-picture show Maker finished processing, you can view the output video.
Source: https://moviemaker.support/docs/quick-tool-record-screen/
Posted by: pickenselly1966.blogspot.com
0 Response to "How To Record Audio With Windows Movie Maker"
Post a Comment